Mummykins & Me Amsterdam Coat
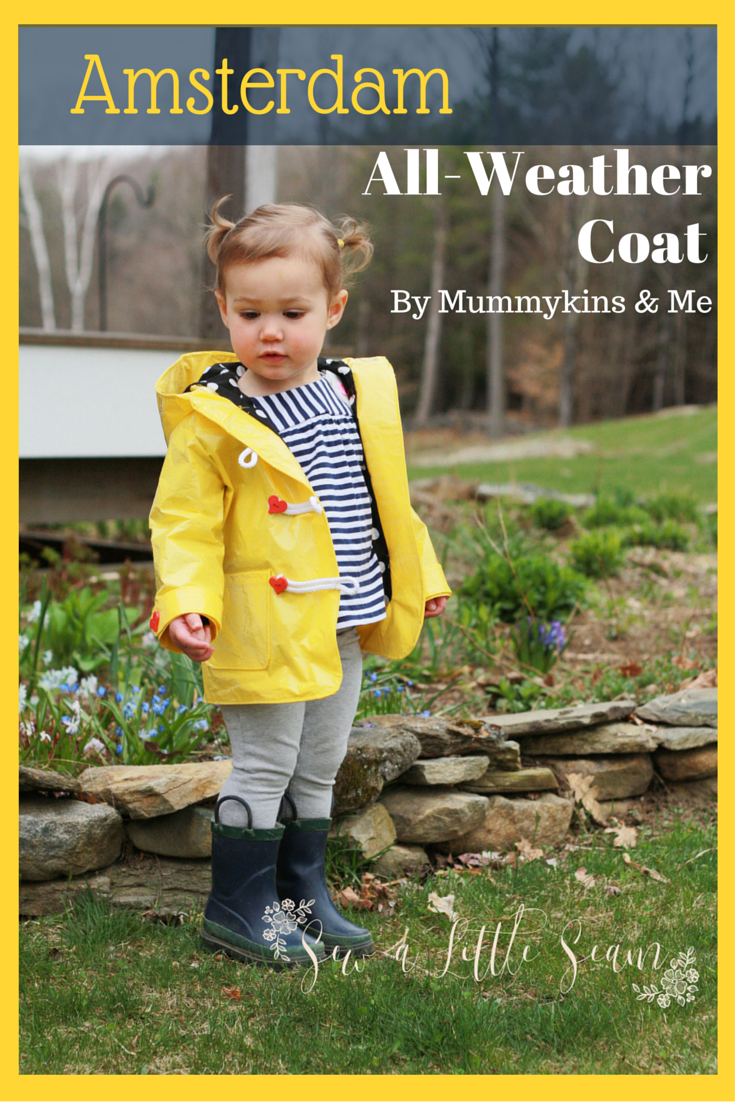
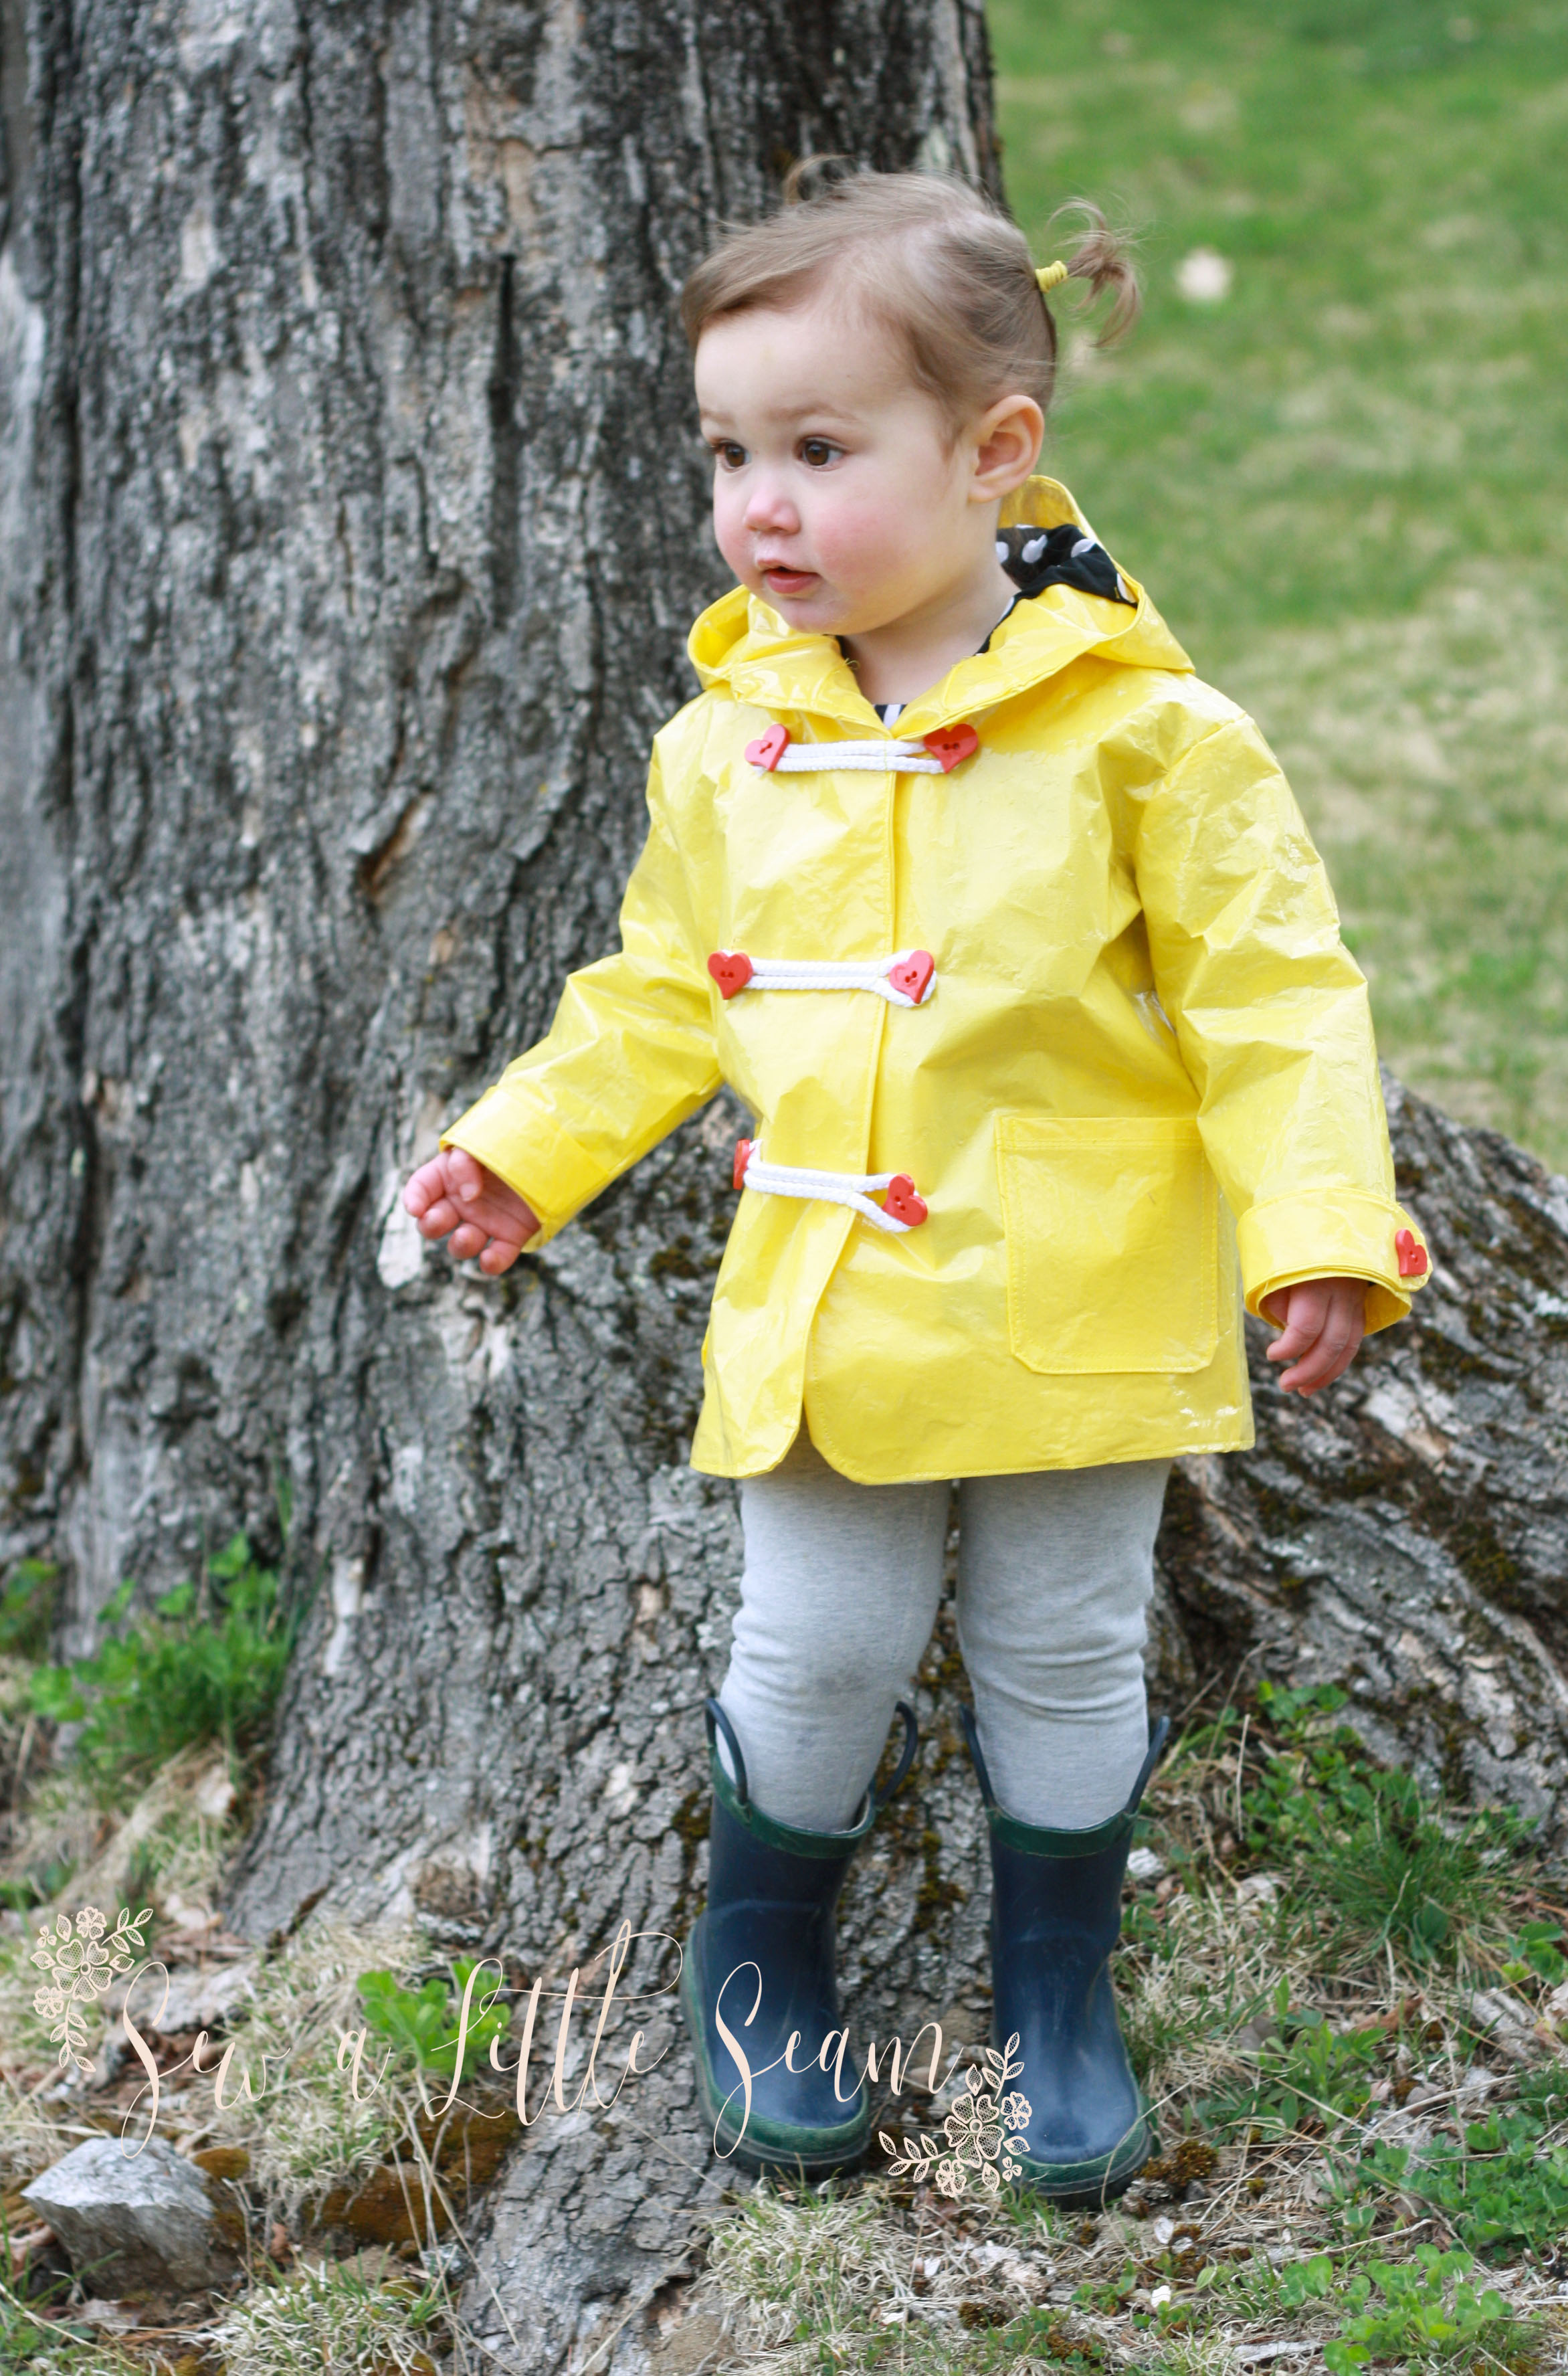
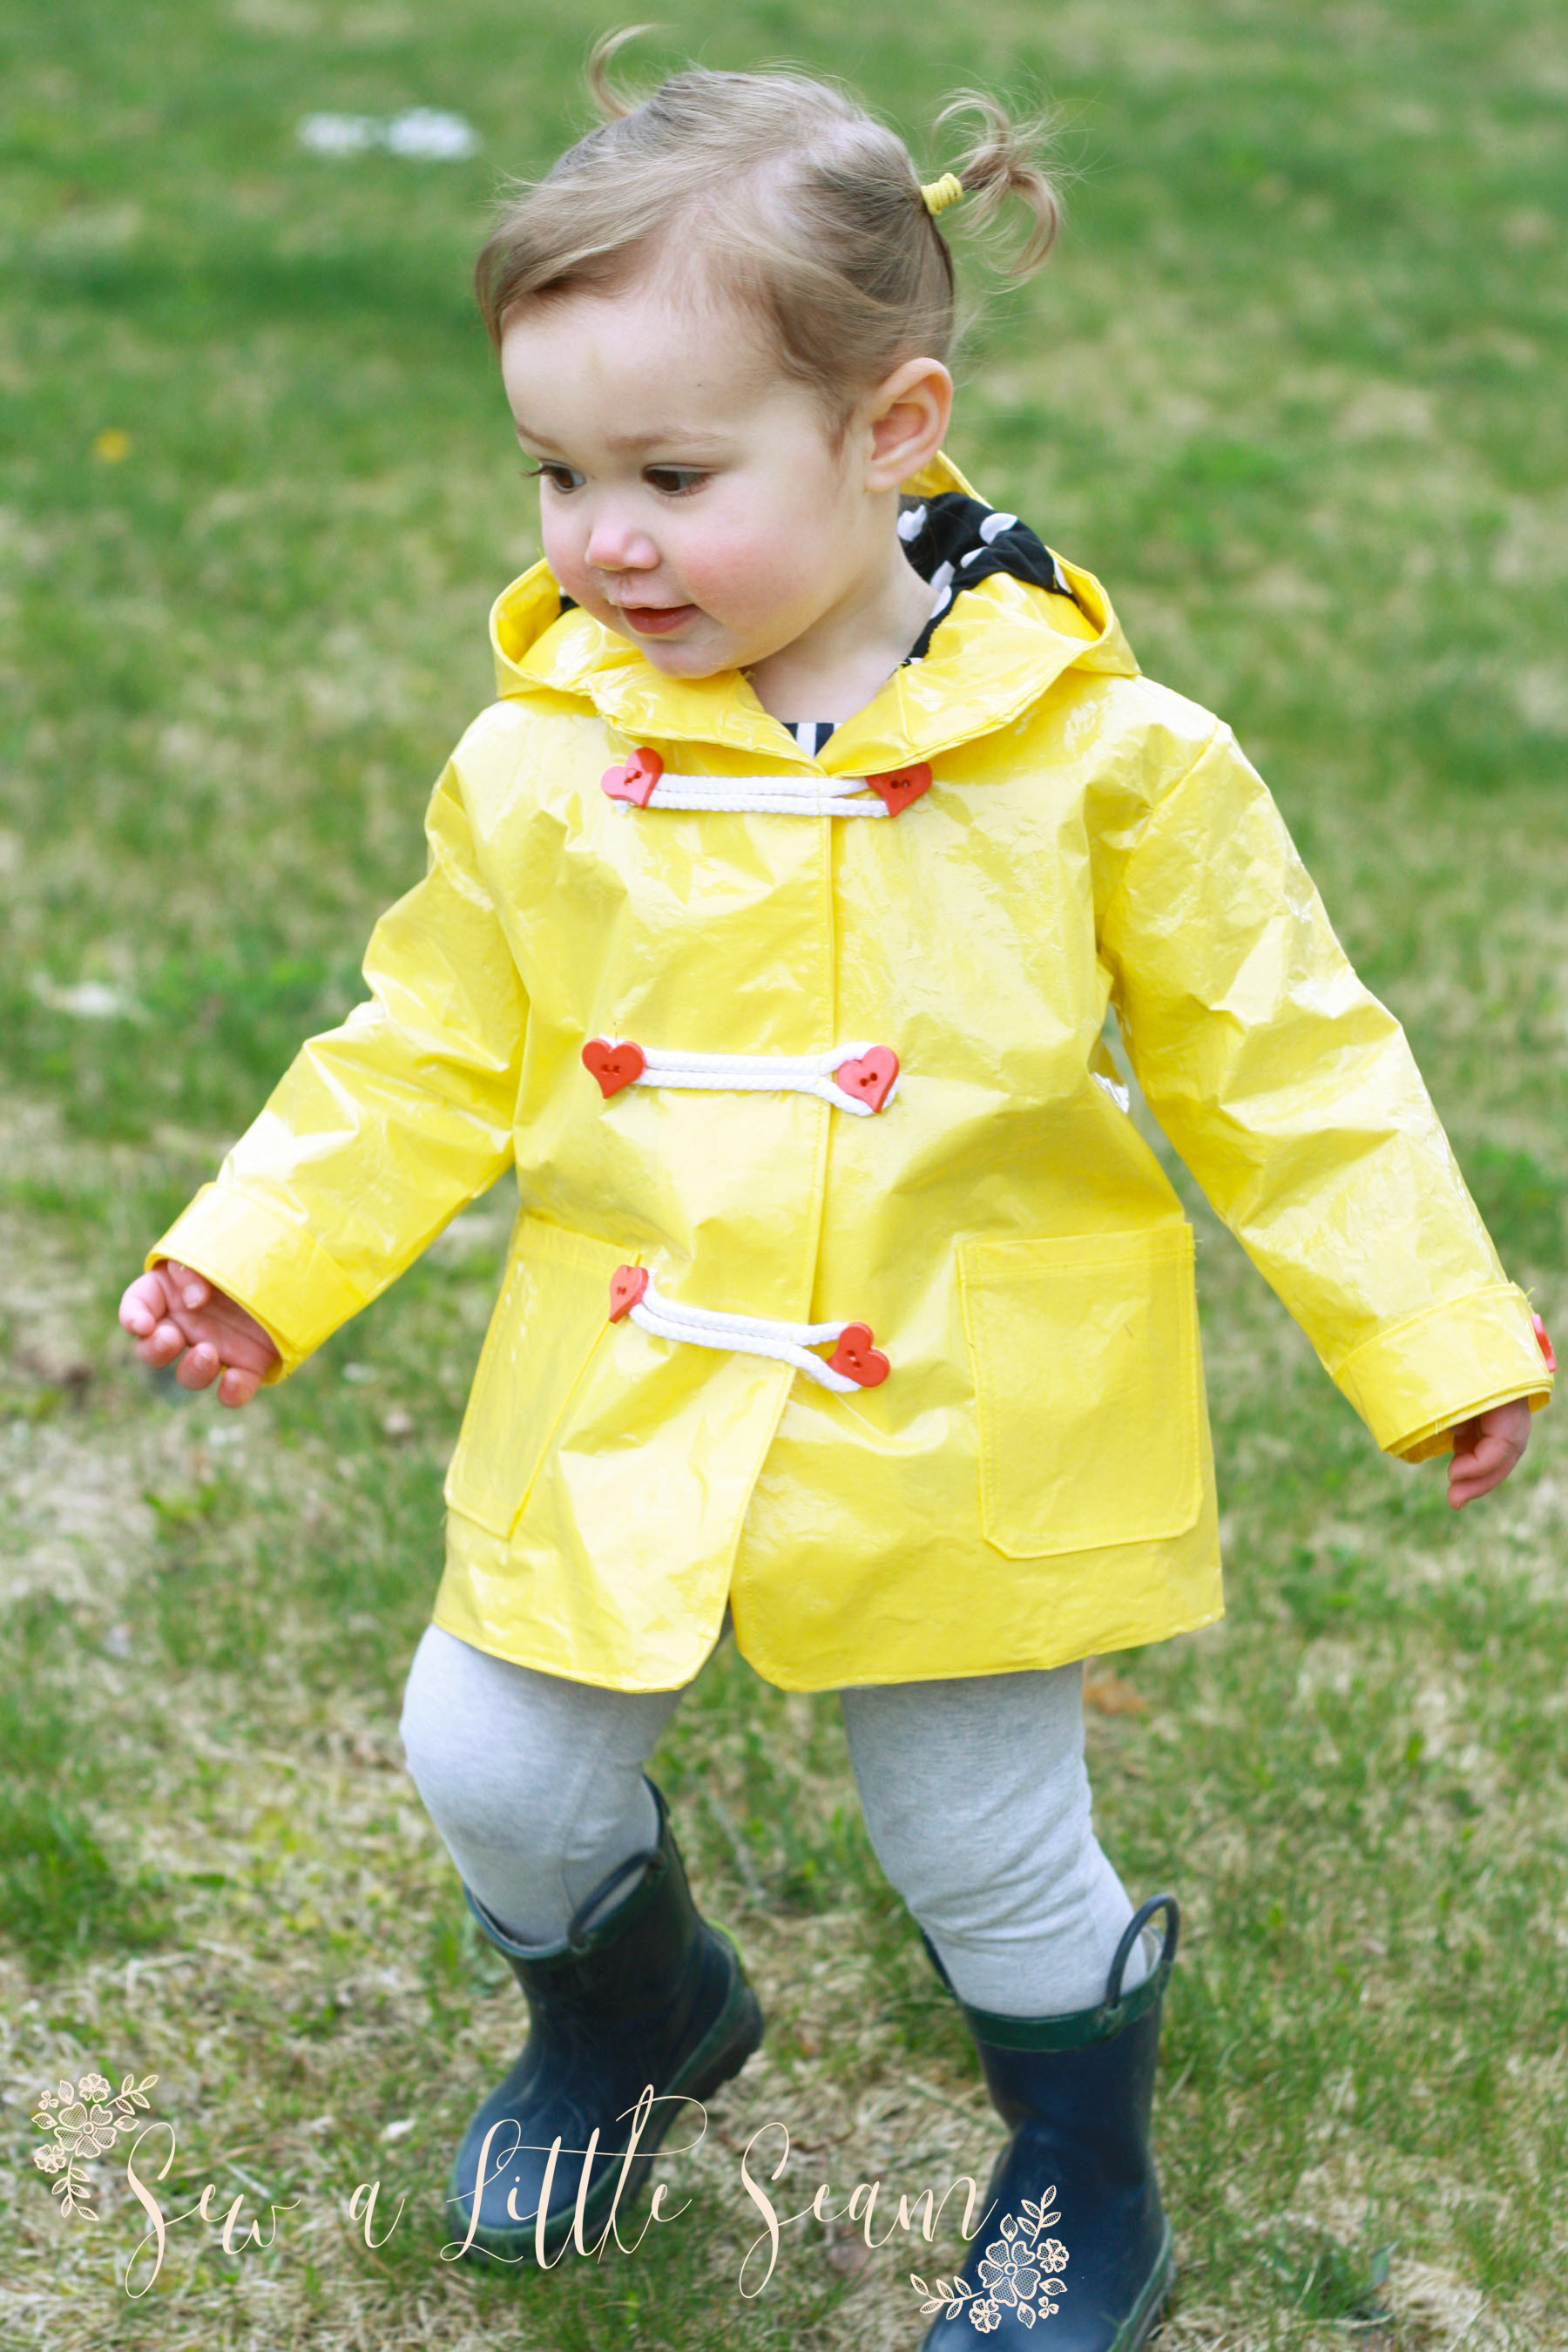
I’m here to tell you about another awesome pattern from Mummykins & Me — The Amsterdam All-Weather Coat! It is so cute and features some great details like pockets, sleeve tabs, and shoulder yoke detail (which I didn’t use for my version). It is fully lined and made for wovens.
I had the great idea of laminating my own fabric to make mine, because I’ve been itching to make a yellow raincoat for so long. Luckily the end product turned out good, because it was quite the process. When I first started I had all these grand ideas of how I would do a tutorial on how to laminate your own fabric and how great it was. And then I started sewing with it and it was like trying to sew plastic milk jugs together. I will say that the second brand of iron-on vinyl was much more pliable than the first, but at that point I already had most of it laminated.
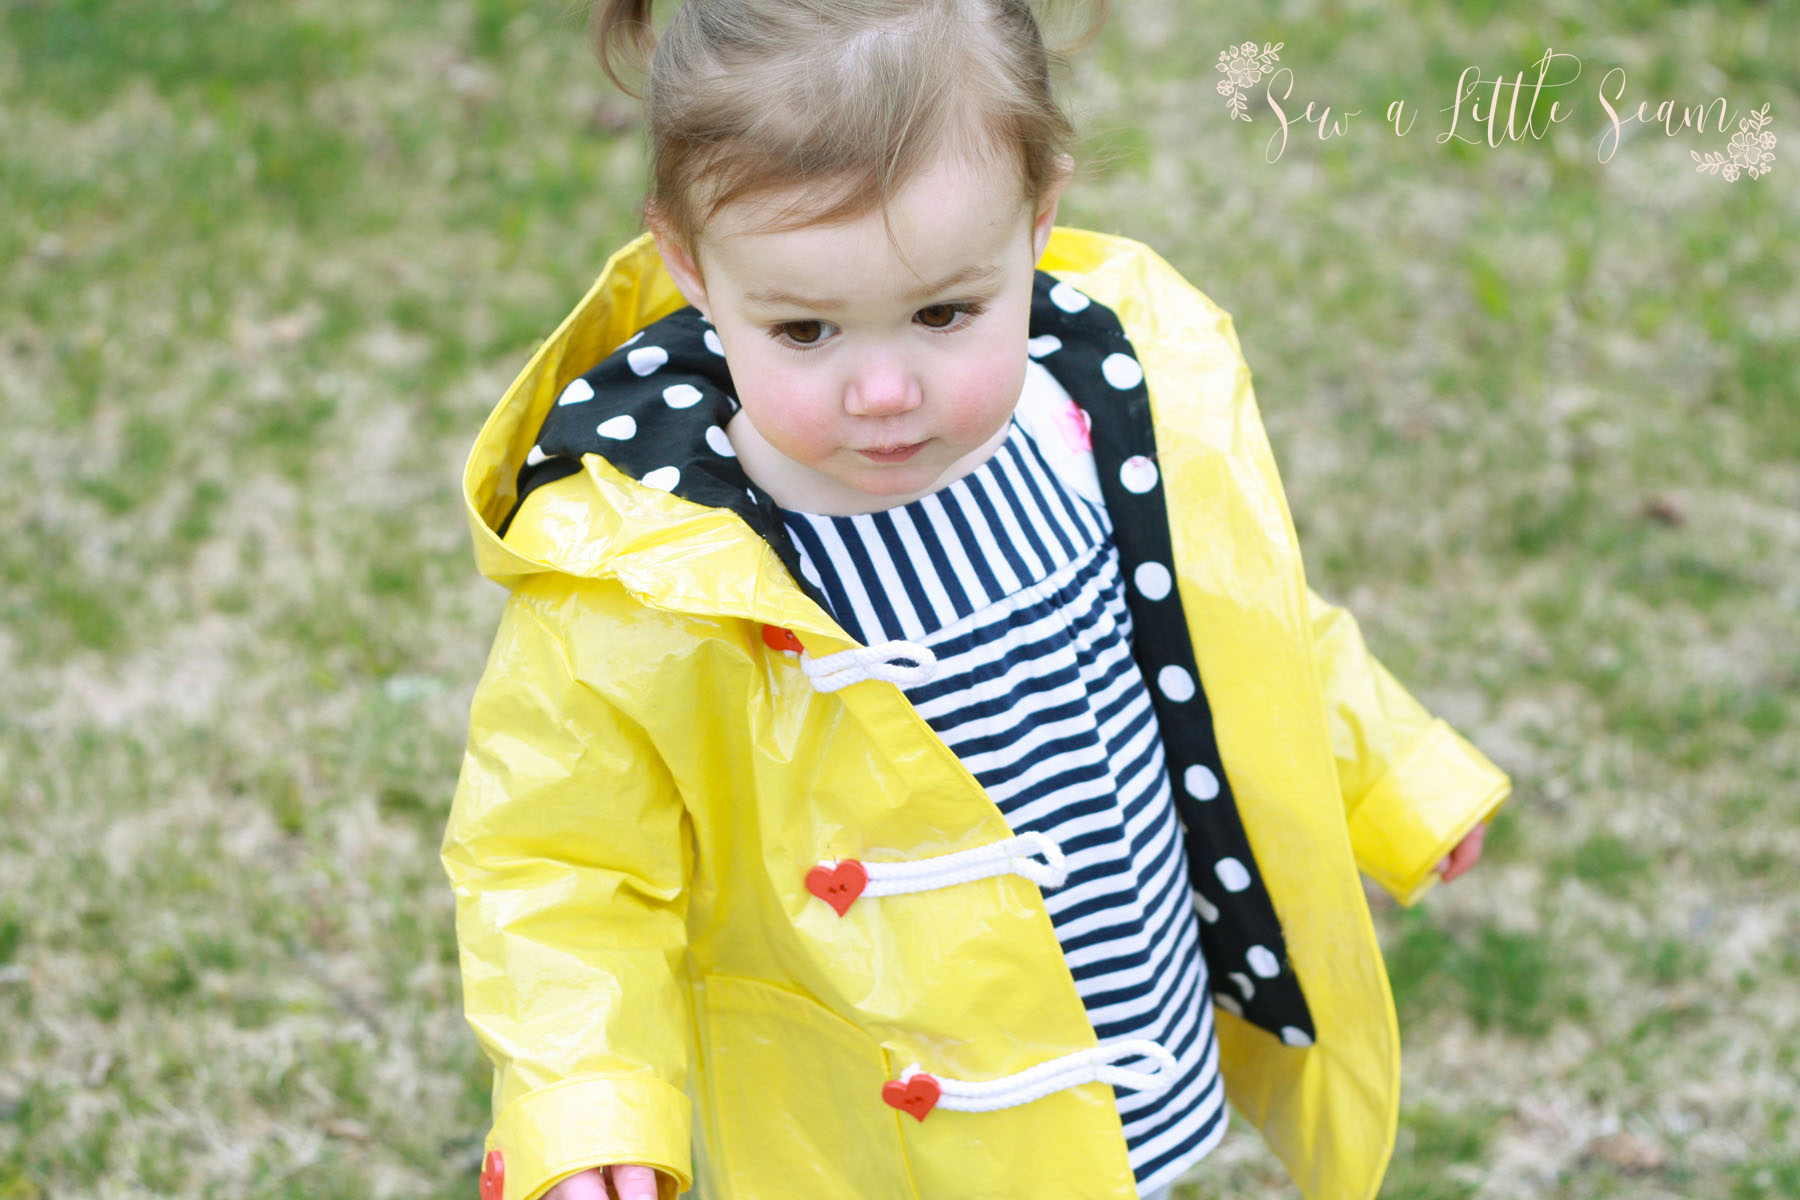
But for those brave souls that would like to give it a try, I’ll leave some tips at the end, but first I want to talk more about the coat! I used some braided trim for my button loops and tried to find black hearts, but ended up buying a dozen other colors before settling on red. I really love the look the loop closures give the jacket.
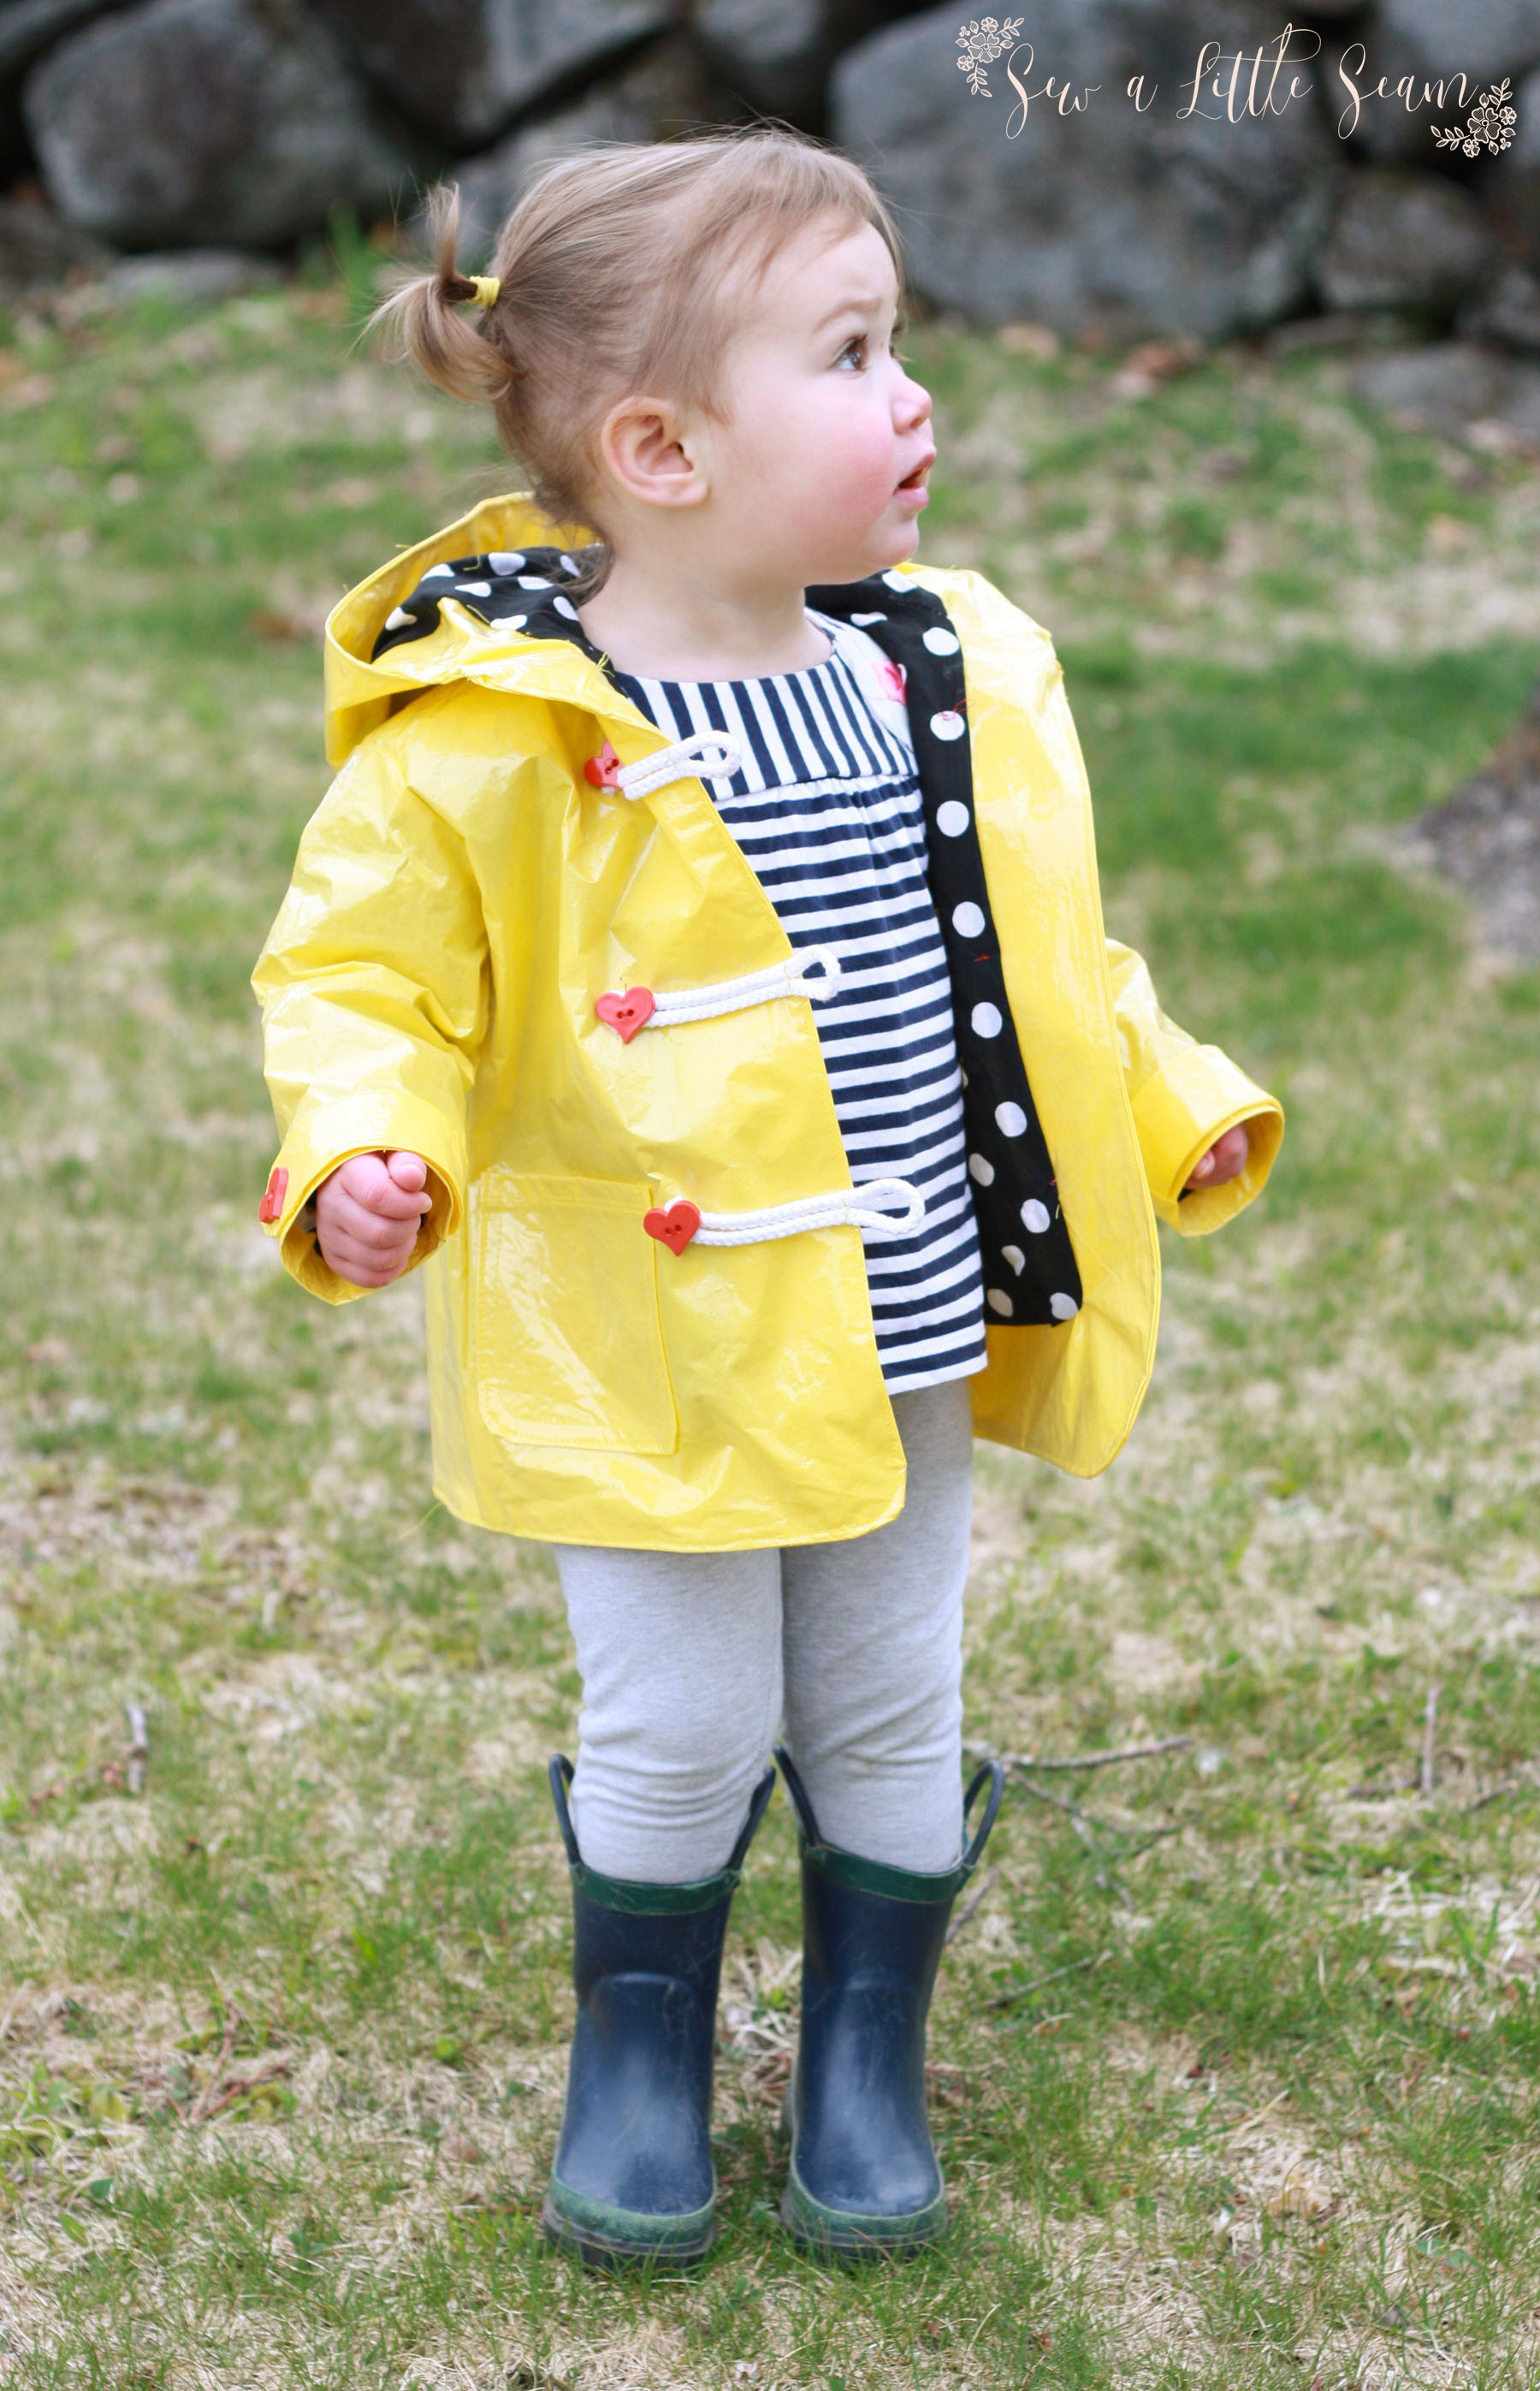
I made the 18-24 month size, but it comes in sizes 12 months to 12 years and Rebecca also offers a matching ladies pattern as well! I already have my fabric all picked out for a wool winter coat for me, and of course a matching mini version. As usual the instructions on Mummykins patterns are incredibly detailed and the pattern is layered and no trim. You can check out the patterns on her website.
And now I leave you with some tips for making your own vinyl laminated cotton:
Number one (and most importantly) buy enough iron-on vinyl! Don’t be fooled when they tell you it is two yards. Yes it is two yards long, but very narrow. Duh, I know, but sometimes my brain doesn’t work at that speed.
Second, use clips instead of pins. You can’t pin this fabric or it will leave marks.
Third, speaking of leaving marks, don’t mess up! Topstitching must be done just how you want it, because you don’t get a redo.
Fourth, you cannot turn little sleeve tabs of vinyl right side out after sewing. You’re going to have to tuck the edges in and topstitch or you’ll end up with a really nice yellow prune looking piece of fabric. The same goes for inset sleeves and when turning out for your lining. You have to be very careful, because the fabric does get permanent wrinkles.
The actual process of ironing the vinyl on was easy and just a few extra steps. I cut my pattern pieces and vinyl out individually and then applied it one by one. The brand I found that worked better for me was Pellon, but there may be others that work better.
Thanks for reading and don’t forget to join my Facebook Group for pattern updates and sewing projects!
