
Hadley Button Hack

Today I have another hack for the Hadley Top & Dress. I’ve been wanting to add button closures to the front straps for a long time and today I’m going to show you how. This will be a great hack leading up to cooler weather since it would look really cute layered.

I used a sweet Robert Kaufman voile for this version. My daughter was super excited she got to eat for her photos. I usually can’t get her to hold still, but this was a great distraction. Not so great that the majority of the photos she is in some awkward chewing state, but eh…whatever works.

Because the front opens with buttons, I made the back without the elastic.

And in other exciting news, here is a sneak peek of my next pattern – the Linden Shorts & Skirt! It’s in pretesting now and should be set to release in another week. Check back for more info!


One more photo and now let’s get down to the tutorial! If you need the Hadley pattern, you can find it here.

Before you cut out your fabric, there are a couple changes to make to your pattern pieces. First, cut your strap piece in half and separate by 1″ (if you plan on layering a shirt underneath separate by 2″). You can either pin it 1″ apart on your fabric or tape a piece of paper between the opening.
Also, fold or cut your back elastic casing piece so that it is the same length as the front chest piece. We won’t be adding elastic to this version, so you won’t need the extra length for stretch. Cut out the rest of your pieces as usual.

Apply interfacing to both your front and back pieces as well as your straps. Fold the bottom of each front and back piece toward the wrong side 3/8″ and press.

Place your front pieces right sides together and sew along one short side, pivot your needle, sew down the top, pivot and sew down the other short side. Make sure that your fabric remains folded up on the bottom.

Clip your corners to reduce bulk.

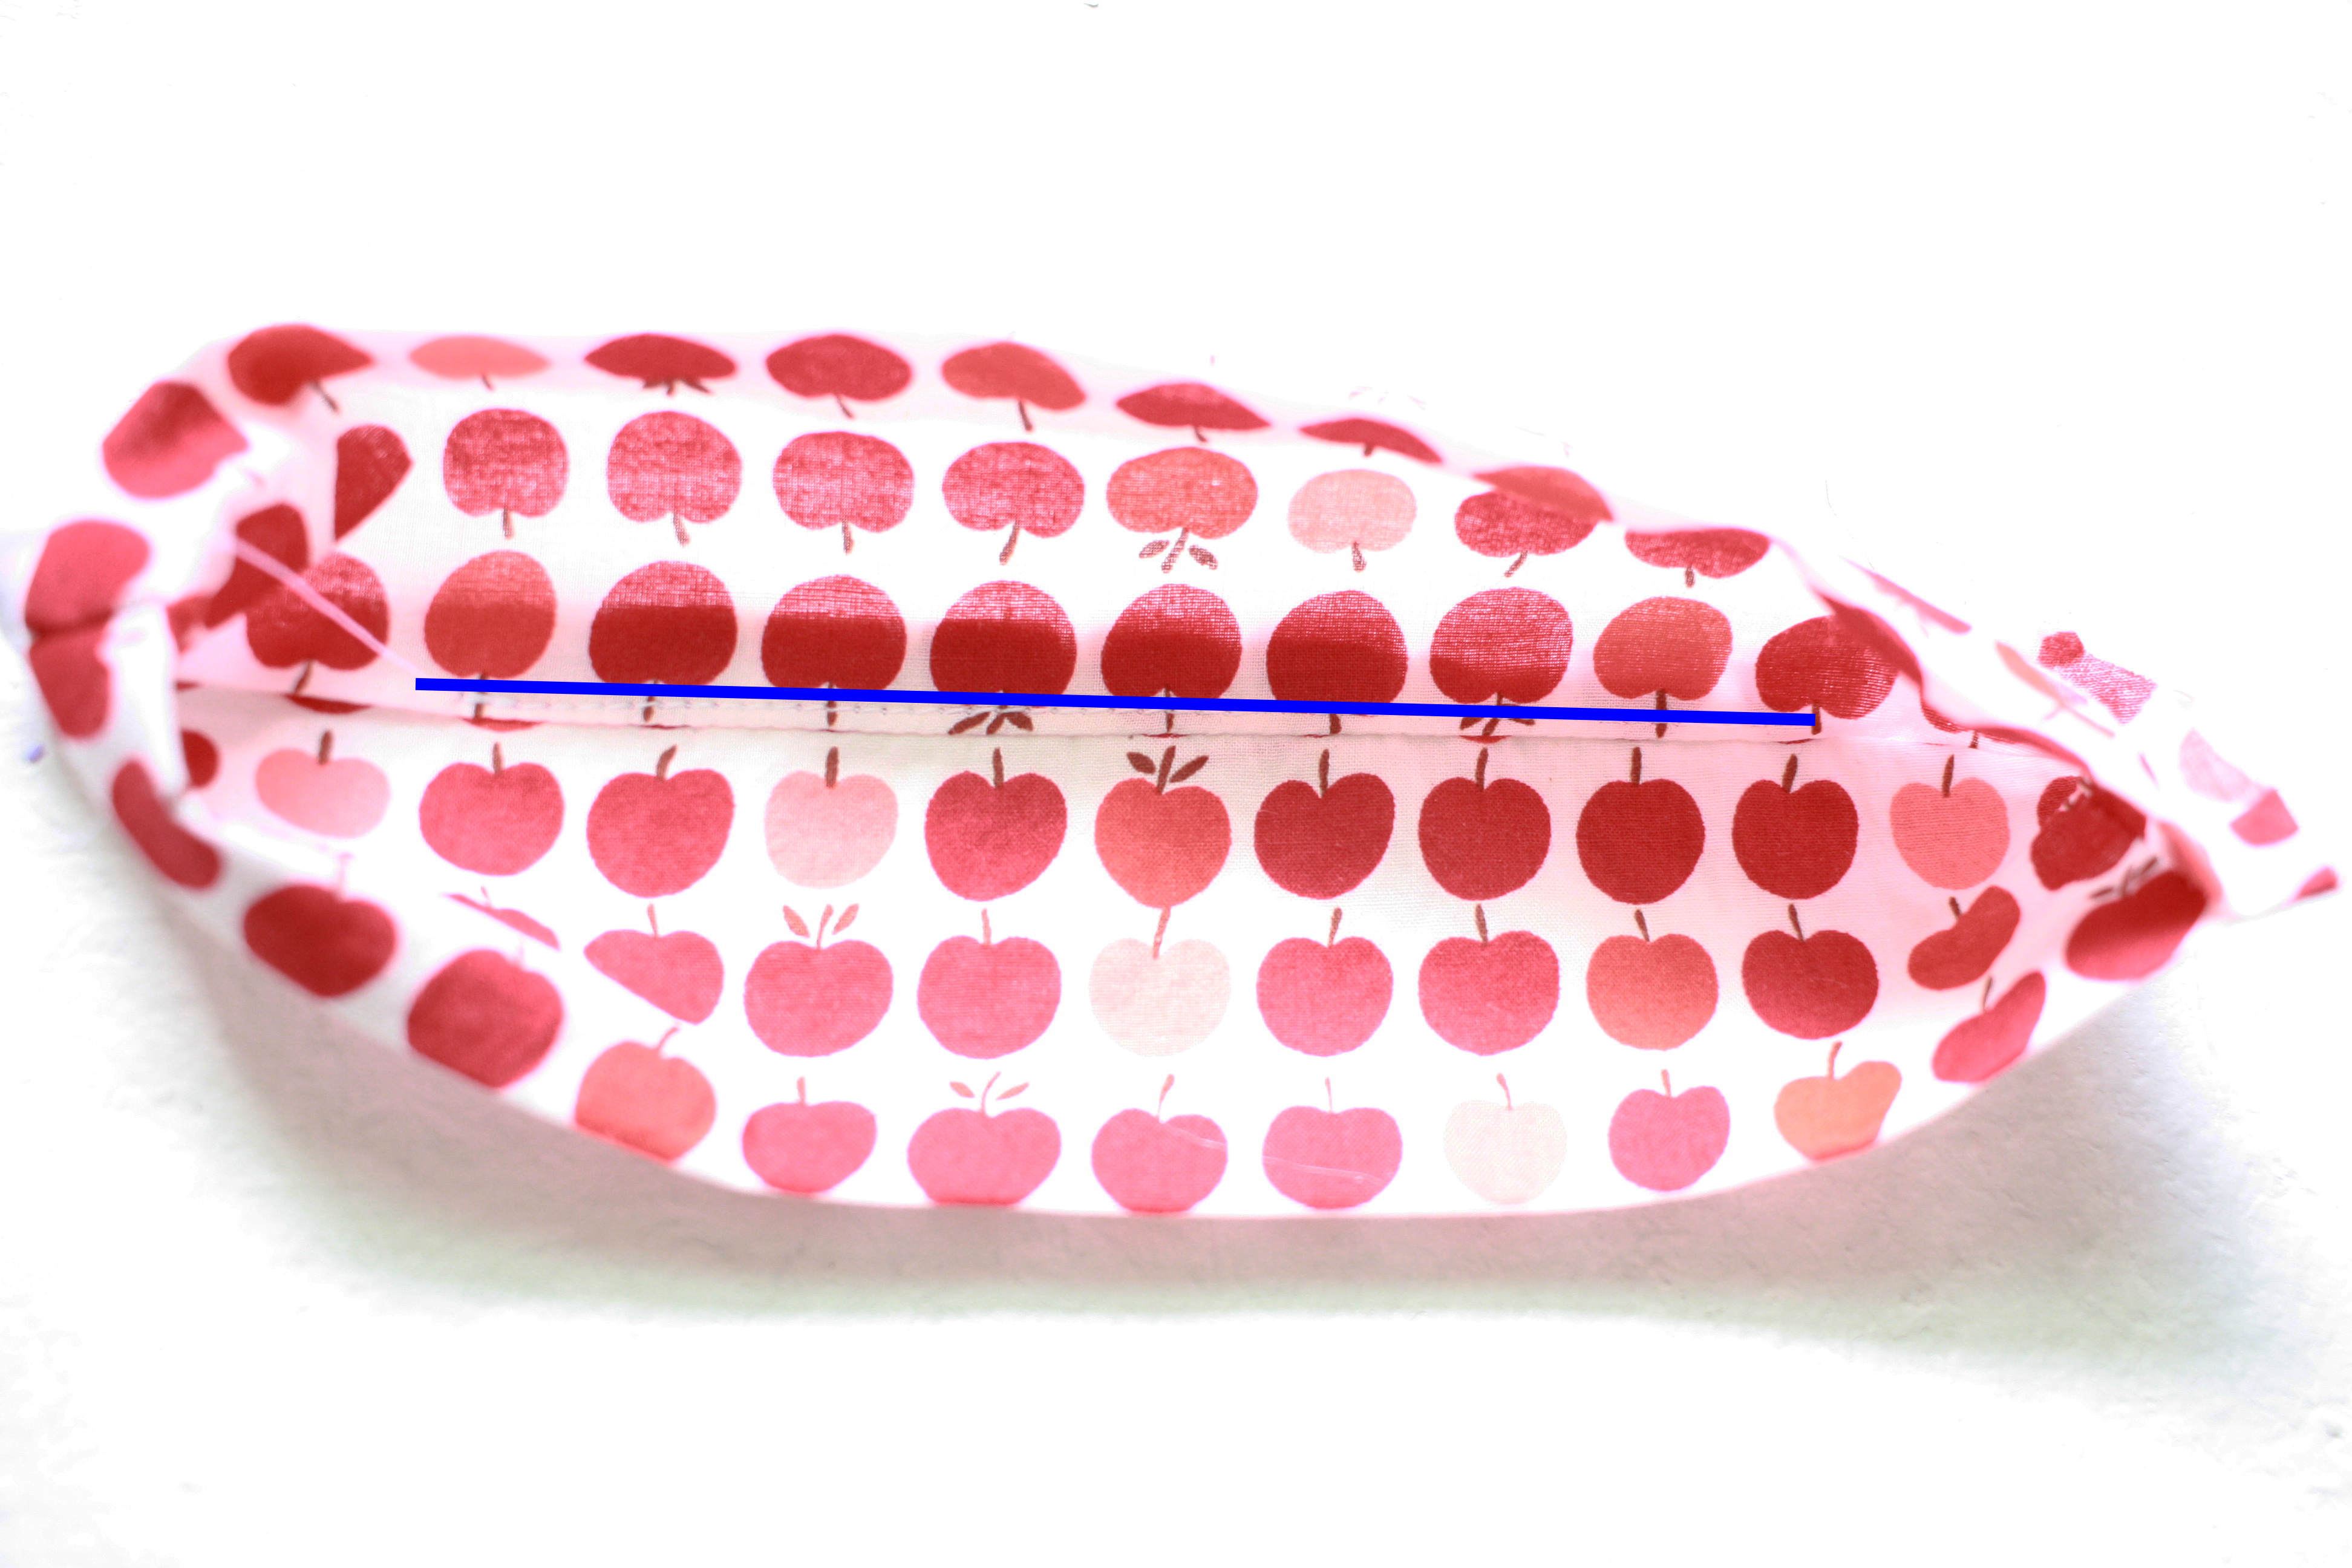
We are now going to edgestitch along the inside top. To do this, fold your seam allowance to the back and sew 1/8″ from the seam, catching the seam allowance as you go. This will keep your seam from showing from the front and you will only see the stitching from the inside of your top or dress.

You won’t be able to sew down the entire top edge, so just sew to where it is easy to do so without catching any other fabric.

Turn right side out, push out your corners and press. From the front there will be no visible stitching.

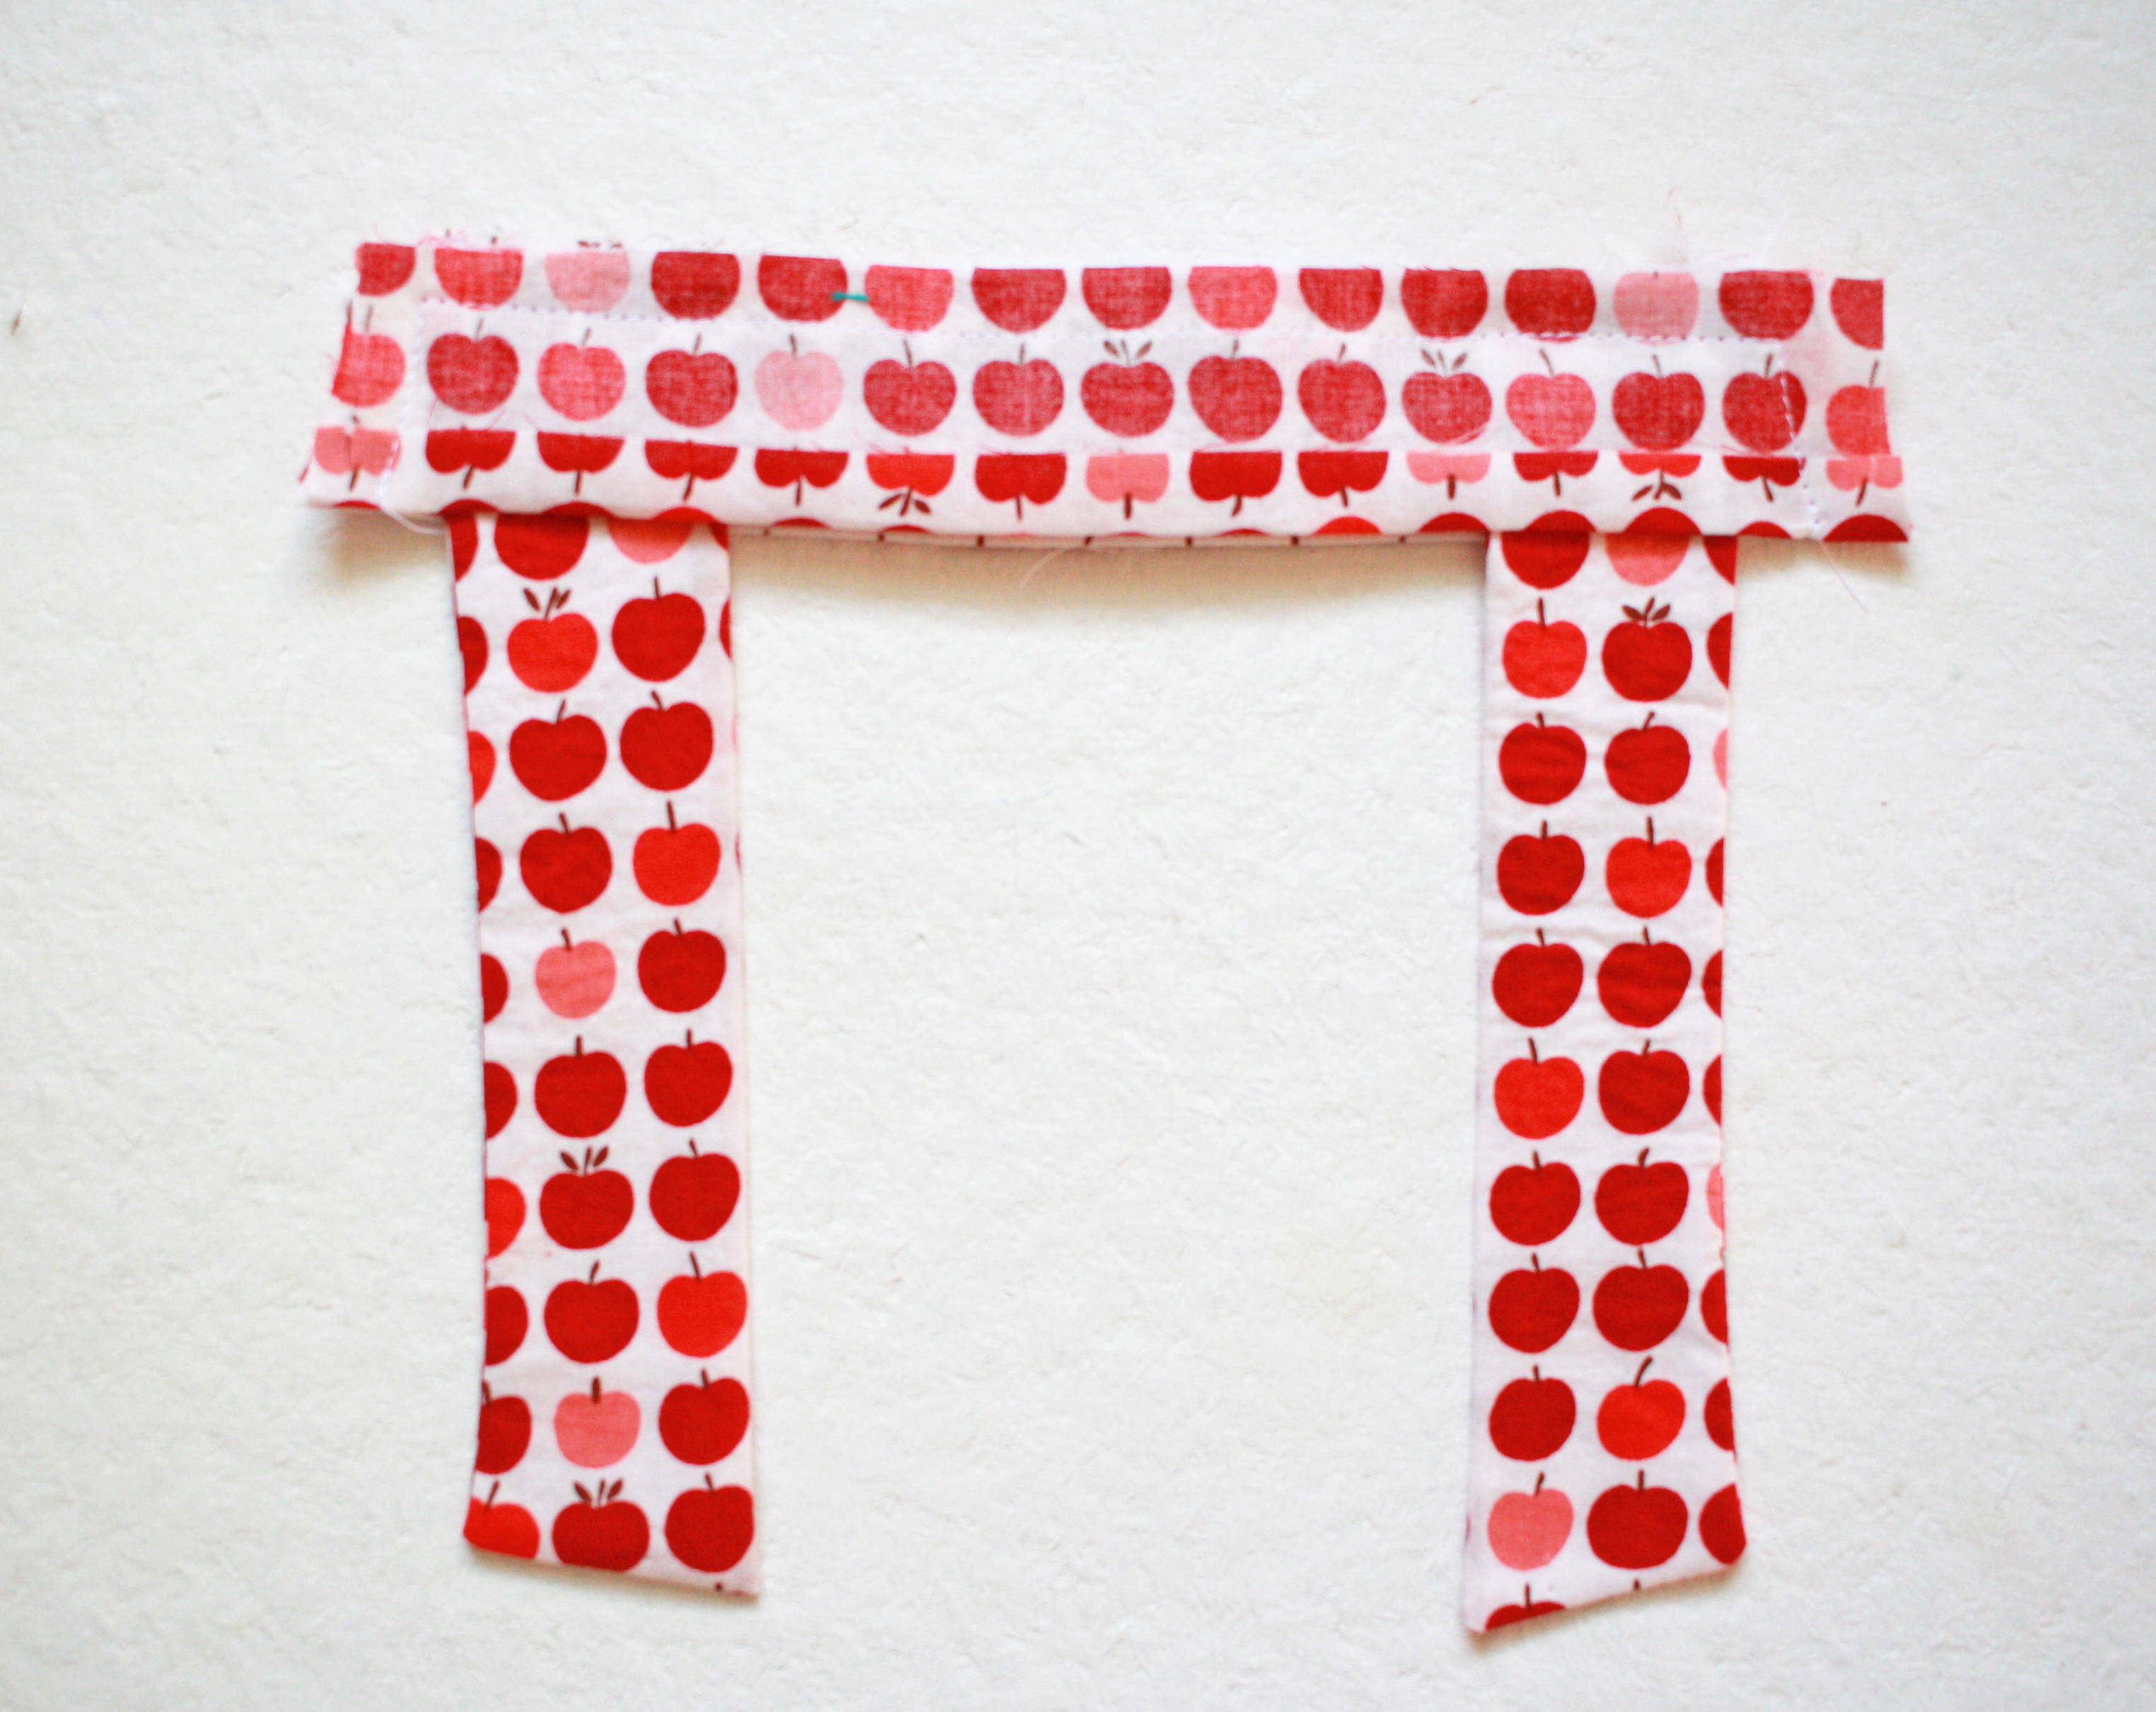
Fold your straps right sides together and sew across the short straight end and down the long side. Leave the angled short end open. Turn your straps through the open end, poke out the corners and press well.

Place the unsewn edge of your straps along the top of one of your strap pieces, right sides together. The seam on your straps should be facing out. Baste the straps in place 1/4″ from the edge.

Place the other back piece over the other, right sides together, lining up raw edges. Sew together as you did the front pieces, being careful not to catch your straps as you sew along the short sides. Check that you did not catch your straps, then turn right side out, poke out your corners, and press well.

Place your two bodice pieces right side together and sew along the edges with a 1/2″ seam allowance. Follow the directions in the pdf on how to make French seams, or you can finish your edges with a serger or zig zag stitch. Turn right side out and press your seams to the back.

Using your template and the instructions in the pdf, cut your bias tape 1″ longer than your arm opening. With right sides together, line up raw edges and sew 1/4″ from the edge.

Press your bias tape and seam allowance up, away from the top and edgestitch 1/8″ from the seam.

Fold your bias tape along the seam to the back side, tucking in the raw edge, and sew close to the bottom. You shouldn’t be able to see your bias tape from the front now. Trim of any excess bias tape.

Sew two rows of gathering stitches (a straight stitch set at the longest length) 1/4″ and 1/2″ from the top of both the front and back.

Pull on both top or bottom threads as you push your fabric along to gather it until it is the same width as your front piece. Mark the center of your chest piece and bodice with a pin.

Place one corner of your top 3/8″ into the opening of the chest piece and pin. Be sure the top is pressed nice and tight into the corner.

Repeat for the other corner and then match up your centers and pin. Continue to pin across the length of the chest piece making sure the front and back are matching and that 3/8″ of your top is now inside. It help to pin well at this step and take your time making sure everything is lining up nicely.

Topstitch 1/8″ along the chest piece. Go slow and make sure you are also catching the back. Remove any basting stitches that show from the front. Repeat these step for your back pieces.

Now add your buttons to your straps and button holes to the front chest piece. Hem by pressing to the wrong side 1/2″ and then another 1″ and sewing along the top folded edge.
And now you’re done! I hope you enjoy this hack and be sure to share on the Sew a Little Seam Facebook Group!
If you have any questions, feel free to email me at sewalittleseam@gmail.com.
